Serial Section Assembler > 1. Select slide image files
1. Select slide image files
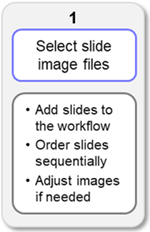
Procedure overview
In the first step of the workflow:
-
Select your slide files to open them in the workflow and move them into sequential order (if necessary).
-
If needed to see your sections clearly, adjust your images using the Image adjustment .
-
 When all slide files are open and in order, click Next Step to continue the workflow.
You can return to this step from step 2 or step 3 if you need to make changes.
Image-file requirements
-
The Serial Section Assembler is compatible with single-plane image files. Image stacks cannot be used.
-
Do not use the Serial Section Assembler over a LAN, bring the slide image files onto the hard drive of the computer that you use to run NeuroInfo software before you start the workflow.
-
The workflow is compatible with many file types. We recommend, however, that you convert your image files to jpeg 2000 (.jp2) format using our free MicroFile+ tool.
If you have any trouble loading your images into the workflow or see unexpected results while using the workflow, your first troubleshooting step should be to convert your images to jpeg 2000 (.jp2) format using MicroFile+.
Tools and commands / Procedure
Select slide files
Add Slide(s)
-
Click the Add slide(s) button. The Image Open window opens.
-
Navigate to and select the image file(s) you want to use for the reconstruction, then click Open:
-
Hold down SHIFT or CTRL to select multiple files.
-
Image files are loaded into the workflow in the order in which they appear in the Image Open window.
The order of the slide image files in the list is important because it determines the order of the images in the reconstruction (you can adjust the order later if needed).
-
You can sort files in the Image Open dialog using Microsoft Windows tools, such as clicking the column headers (e.g., by name, date, or size) and filtering by clicking the drop-down arrow
 in the active column header.
File list
-
The files you open are listed in the
-
The Status column shows the result of a file-validation check that occurs when moving to the next step in the workflow. Valid indicates that there are no problems with the file. Any problems that interfere with the workflow will be shown; these issues must be resolved in order to move to the next step in the workflow.
-
-
 (optional) Adjust your images so that you can clearly see the individual sections and their distinctive features using the Image adjustment .
 -
Click on a file in the list to select and display it.
-
Adjust image appearance in the Image adjustment panel.
-
Do this for each slide-image file.
-
-
Make sure that the slide-image files in the workflow window are in sequential order. If you need to re-order or delete files, use one of the following (equivalent) methods:
-
Click Edit and Order List in the
-
Click and drag files to change their position in the list.
-
Select files and click Delete to remove them from the workflow.
-
Click Sort List to return files to the order in which they were sorted in the Image Open window.
-
Click OK to save your changes and close the window.
-
-
 Open the Image organizer from the Workspace ribbon.
-
Click and drag files to change their position in the list.
-
 Click on an image-row in the organizer and use the arrows to move the image up or down in the list.
 -
Click the Checkbox to select an image file and click
 Delete to remove it from the workflow.
-
-
Specify Type of Image
-
Verify that the image type was correctly classified (Brightfield or Fluorescence).
Choose the correct image type if necessary by clicking its radio button.
-
Click Next Step to continue the workflow.
When you click the Next Step button, NeuroInfo automatically detects tissue sections in the images and draws contours around each one.
Go to 2. Edit and order the sections