Serial Section Assembler > 6. Save reconstruction
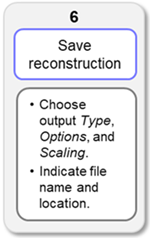
6. Save reconstruction
Procedure
In this step, you select options for saving the full-resolution 3D reconstruction. You'll also be prompted to save your work in the workflow to a case file.
-
Save the case file if you haven't already done so.
If you haven't saved your work, a message will open that asks if you want to save changes to the case file. We recommend that you save your changes; click Yes.
-
Indicate the file name and location for the case file and click OK to save or update it.
-
-
Choose output type, output options and (optional) scaling for the reconstruction.
-
Save the reconstruction. If you have not already saved a case file with your work, you will be asked to do so before the reconstruction is saved.
Tools and commands
Output Type
Choose whether to save your reconstruction as one of the following:
-
Single stack image (.jpx): Saves the reconstruction as an image stack (a multiple plane image).
-
Series of images (.jp2 or .tif): Saves the reconstruction as individual sections and image planes.
The section and outline/contour numbers are added to the end of the file name, e.g., "FileName_Section00001_Contour001.jp2".
-
Save channels separately: [Available if you choose Series of images as the output type.] Check the box to save individual color channels as separate files.
The channel number is added to the end of the file name, e.g., "FileName_Section00001_Contour001_Ch01.jp2".
Output Options
-
Distance between sections: Review the distance and, if needed, type the distance (in µm) between consecutive sections in the series into the box.
- Image resolution: Select the desired resolution from the drop-down menu.
- Compression: The default compression ratio is 20:1. You can use the slider to specify a different compression ratio if desired. The ratio is listed on the right just above the slider.
- Save tracing data: Check the box to save the section outlines/contours with the reconstruction.
Scaling Override
Override X and Y scaling: Check the box to enter scaling information for X and Y in µm per pixel. This will override any scaling information that was in the slide image files.
Saving the reconstruction
Open reconstruction on completion: Check the box to open the reconstruction in NeuroInfo when the save is complete.
 Click Save reconstruction to save your work and complete the Serial Section Assembler workflow.
You will see one of the following, depending on your choices:
-
Single Stack image was chosen as the output type: The Save Reconstruction as window opens. Indicate the name and location for your 3D reconstruction image-stack file. Use the drop down menu to select one of the available file formats, then click Save:
-
MBF JPEG2000 files include enhanced metadata about the image
-
JPEG2000 file format offers smart compression that can result in minimal data loss with a significant reduction in the amount of storage space needed.
-
-
Series of images (.jp2 or .tif) was chosen as the output type: The Save Registered Sections as window opens. Indicate the name and location for your aligned section files. Use the drop down menu to select one of the available file formats, then click Save:
-
JPEG2000 file format offers smart compression that can result in minimal data loss with a significant reduction in the amount of storage space needed.
-
MBF JPEG2000 files include enhanced metadata about the image
-
TIFF file format is uncompressed
-
About image resolution
NeuroInfo determines a maximum resolution for the reconstruction based on the original image resolution and the alignments.