Serial Section Assembler > 5. Review alignment
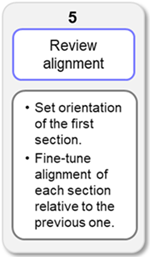
5. Review alignment
Procedure overview
In this step, you can review and fine-tune the automated section alignment from the previous step to help ensure that the final reconstruction reflects the anatomic structure of the
-
Set the orientation for the 3D reconstruction.
When the workflow opens, the first section is displayed. Adjust the rotation so that the section is straight and level; this sets the orientation for the entire volume. For example, many users adjust coronal brain sections so that the midsagittal plane is vertical.
-
Adjust the alignment of each section relative to the previous section in the sequence so that sections are oriented consistently through the reconstruction. To facilitate this process, all sections, apart from the first, are shown superimposed on the previous section.
-
 When you complete the process of fine-tuning the alignment of all the sections, click Next Step to continue the workflow.
Tools and commands
Zoom level
-
Adjust the Zoom level using the Zoom in and Zoom out buttons so that you can easily see the margins and features of your sections.
-
Reset Zoom: resets to the default zoom level
-
Alternatively, you can use the Zoom controls on the Move ribbon (some functions are identical) .
Image controls
Many of the image controls are also available as keyboard shortcuts; they are listed at the bottom of the workflow window.
Tools in this section of the workflow window are designed to make it easy for you to:
-
Rotate the first section in the sequence so that it is straight and level. You may want to check the box to Show Grid for this step.
-
Precisely shift subsequent sections to fine-tune the automated section alignment.
Transparency: |
|
|
|
All sections, except the first, are shown superimposed on the previous section—both are semi-transparent by default.
|
Shift: |
|
|
|
|
Rotate: |
|
|
|
|
Buttons |
|
|
|
Reset: Undo manual adjustments and reset the section position to the result of automatic registration. Flip: Flip or reverse the section along its vertical axis so that features that were on the right are now on the left and vice versa. Refine: Automatically refine the alignment after you have manually adjusted the position of the section (rotation or translation). Metric: Quantitative indication of how well the sections align on a scale of 0 (worst) to 100 (best). This value and its range are relative across brains; you can use it to compare alignment success of sections within an individual |

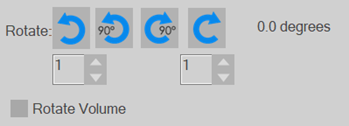
 Rotate left or
  right by the number of degrees in the box just below the button. Use the arrows or type in the box to change the number of degrees the section is rotated when you click the button.
 Rotate 90° left or
  right
right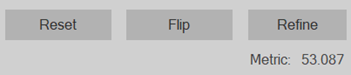
Show grid
Show the grid to assist in orienting sections.

|
|
Moving between sections
Review the alignment of each section that will be used for the reconstruction; use these controls to view each section superimposed on the previous section (except the first section, which is shown alone).
|
|
|

 Jump to the first section.
  Jump to the last section.
 Move to the previous section.
  Move to the next section.
Shortcuts
A list of keyboard shortcuts for the Image controls in this workflow step is displayed at the bottom of the window. Using keyboard shortcuts can save considerable time compared to clicking buttons onscreen.
|
Movement |
Hot Key |
|---|---|
|
Move Left |
Left arrow |
| Move Right | Right arrow |
| Move Up | Up arrow |
| Move Down | Down arrow |
| Rotate Left | , (comma) |
| Rotate Right | . (period) |
| More Visible | + (Plus) |
| Less Visible | - (Minus) |
| Toggle Visibility |
Alt + 0 |
| Rotate Left/Right | Mouse wheel |
In this step, the image information shown in the Image Adjustment panel does not reflect the original image data. Instead, it reflects display adjustments used to make the alignment-adjustment process easier to visualize. The original acquired image data is preserved and used for stack reconstruction and output.
Go to 6. Save reconstruction