Registering sections
Before you start
In order to register sections with an atlas, you need atlas calibration parameters. Learn how to perform an atlas calibration here.
TIP: Before you start, we recommend that you place fiducial points in the image every five sections so that you can verify the registration accuracy later.
Because brain sectioning is never exactly orthogonal, you need to estimate the sectioning angle for your specimen.
To help you estimate the sectioning angle, we provide transform tools in the Section Registration panel. With these tools, you'll generate a reference section that will be used to register your experimental sections to the atlas at once. We'll explain how to do that in the steps below:
Procedure
-
 Load your calibration parameters: Click atlas calibration in the Registration ribbon bar; in the Atlas Calibration window, select a calibration name and click Load.
 - In your image, choose a section from the middle of the brain (where landmarks such as hippocampus and fiber tracts are easy to identify). This is useful because NeuroInfo software will display a section from the middle of the Atlas brain first when you launch the registration process.
-
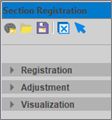
 From the Registration ribbon bar, click Section Registration. This opens the Section Registration panel and the Atlas window (see Section registration panel for details on the panel and the window).
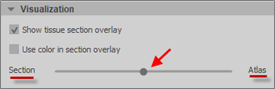
- In the Section registration panel, use the options from the Visualization section to optimize the visualization of the overlapping sections (experimental section and section from the Atlas) in the Atlas window.
Adjust transparency, black point, and white point with the sliders: the closer to Section, the more visible the experimental section; the closer to Atlas, the more transparent the experimental section.
- Use the sliders from the Adjustment section to apply transforms to the atlas section to obtain the best preliminary match with the experimental section. To use the sliders, drag the circle or click the circle and scroll the mouse wheel.
- Shift in Z to identify the section that best matches in the atlas.
- Scale in X and Y to match the size.
- Rotate as necessary.
- Click the Run Linear button in the Registration section to refine the alignment between atlas and experimental section.
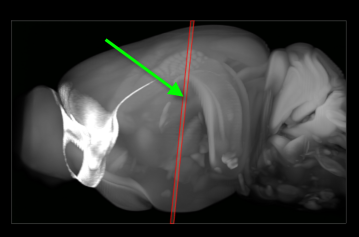
- In the Atlas window, take a look the section overlays in XY and at the red lines over the 3D brain (they represent the sectioning angle suggested by NeuroInfo) to assess the accuracy of the match.

- If you're satisfied, click the Save transforms button. This saves the atlas section with the transforms that were applied to it as a reference section that is then used as a basis to register all the sections in the next step.
- Optional: Repeat steps 4-8 for adjacent experimental sections to generate multiple candidate reference sections. Then use the most suitable candidate to register sections.
- Register all the sections using the Registration section:
- Select multiple sections.
- Click the all button.
- Select the Reference section that was generated in step 8 from the dropdown.
- Check lock sectioning angle and lock relative scale.
- Click run linear to apply .
- Click run nonlinear for more transforms to take small abnormalities into account.
- Now that your sections are registered, you are ready to map data from cell detection to the atlas.