![]() See/Print PDF
See/Print PDF![]() Watch a video on YouTube (2:47)
Watch a video on YouTube (2:47)
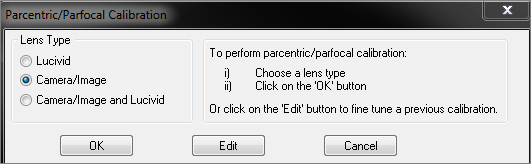
Parcentric and parfocal calibration compensate for the deviations from parfocality (focal plane) and parcentricity (collimation) that are normally encountered between different microscope objective lenses. They are both critical for maintaining proper position when changing magnification.
When switching between objectives:
Once you've calibrated the lenses, you're ready to perform the parcentric/parfocal calibration. Don't move the stage at any time; don't use oil with oil objectives.
Use the Options>General Preferences> Cursor tab to increase the Crosshair Size (recommended: 75 px) OR hold down the CTRL key while pressing the Up or Down arrow keys.
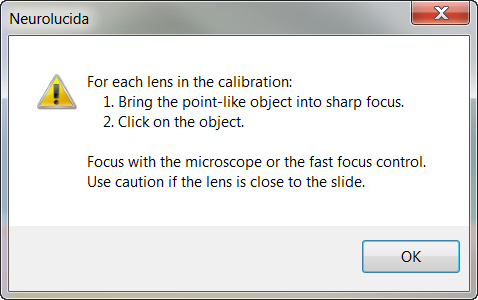
Align the crosshairs of the cursor with the edges of the grid as precisely as possible. You'll use the same point with the other objectives. 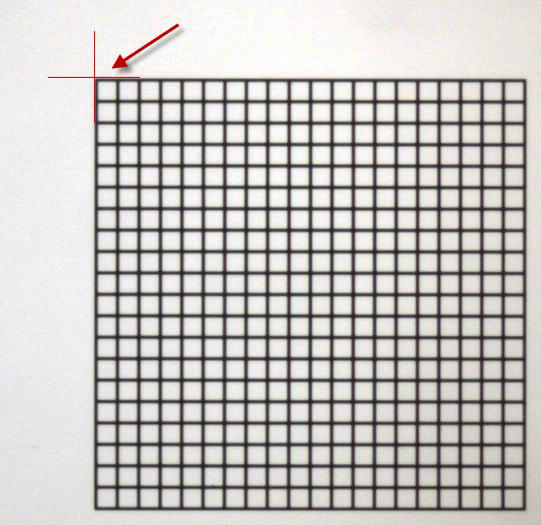
Optional: Before switching objectives, adjust the light level on the microscope to see the grid clearly enough.
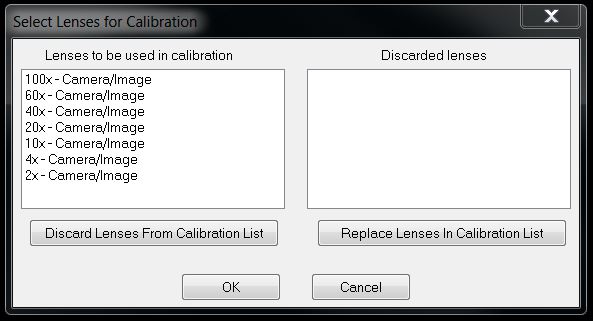
When you switch objectives on the microscope, the program automatically selects the corresponding software lens.
Check whether Fit Video in Window (Options>Camera setup>Settings tab) is selected.
When the video resolution is higher than your monitor resolution, and only the top left of the video is visible in the tracing window. Select Fit video in Window to reduce the size of the video so that the entire video is visible within the tracing window.
When the video resolution is lower than your monitor resolution, and the entire video is displayed in the top left of the tracing window with black regions bordering the bottom and right of the video. When enabled, Fit Video in Window will attempt to fill the tracing window with the video by stretching the video. make sure to uncheck the box.
Once all lenses have been calibrated, the Enable Parcentric Parfocal Corrections window appears. Check BOTH the Enable Parcentric box and the Enable Parfocal box. 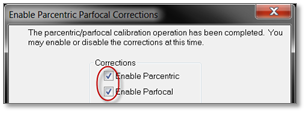
![]() For microscopes with an internal motorized Z axis, check Enable Parcentric Correction only; un-check Enable Parfocal Correction. This is because parfocal correction is controlled via the microscope itself. Refer to your microscope manual for more information on adjusting parfocality. On a Zeiss microscope, use the touch screen to access Home>Configuration>Focus>Parfocality Adjustment.
For microscopes with an internal motorized Z axis, check Enable Parcentric Correction only; un-check Enable Parfocal Correction. This is because parfocal correction is controlled via the microscope itself. Refer to your microscope manual for more information on adjusting parfocality. On a Zeiss microscope, use the touch screen to access Home>Configuration>Focus>Parfocality Adjustment.