
Combine images into a projection
Overview
|
Combine 2D images into 2D minimum-, maximum-, or deep focus–projection JPEG 2000 files, with the file extension ".jpx" (learn more about the format). |
See the list of compatible file formats.
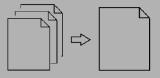
Example: Convert many 2D tiff images into one 2D max projection JPEG 2000 file.
The procedure includes 4 steps (click steps to jump to procedure details):
- Choose conversion settings
- Indicate files to be converted and the destination for the converted files
- View and/or edit metadata
- Click to convert the files
Procedure
-
Click Convert image(s) to choose file-conversion settings.
-
Save Format: This portion of the window is grayed out. Files are saved in JPEG 2000 format.
-
JPEG 2000 Compression: If you chose JPEG 2000 or Both, choose the compression settings for the JPEG 2000 image; file conversion to this format can be compressed (lossy) or uncompressed (lossless).
- It is recommended to select lossless compression when converting images approximately 1 GB or less in size.
- If you choose Lossy compression, indicate the compression ratio desired.
-
Choose the Projection type and quality.
Projection types
- Deep Focus: identifies the pixels with the highest sharpness value
- Max Projection: projection identifies the maximum intensity value of each pixel along the z axis
- Min Projection: projection identifies the minimum intensity value of each pixel along the z axis
Projection Quality
- Automatic
- Manual
-
Advanced: Other available options
- Skip .jp2 (JPEG 2000) files
- Force incremental saving
- Require metadata entry before saving: this option is selected by default
-
-
Click Next to select file(s) for conversion and indicate the output destination.
Images selected or dragged and dropped together will be combined into one projection image. Multiple projection images can be created by selecting or dragging and dropping each series of images separately.
-
Select the image(s) to convert by either method below:
- Drag and drop: select images as a group and drag into the MicroFile+ window together. To create multiple projection images, drag and drop the files in groups.
-
Click the Load files.... button, navigate to the location of the file(s) you want to convert, select the group of images to combine into a projection image, and press Open.

- To create multiple projection images with the settings chosen in Step 1, repeat the file-group selection process.
- The file(s) will appear as groups in the MicroFile+ window.
- To remove a file from the conversion window, select the file and press Remove Selected.
-
Destination for image file(s) after conversion:
- By default, projection image file(s) are saved to the same location as the original(s).
-
To select a different location for all projection images in the window, click the Select Output... button, navigate to the destination folder, and click Select Folder.

-
To select a different location for individual projection images in the window, click the Save button next to the file name, navigate to the destination folder, click Open, and click Save.
-
-
Click Show Metadata to view/edit metadata.
- The Show Metadata button is in the lower left-hand corner of the window.
- Click to select a file group in the conversion window and view the metadata that will be written to that projection image in the Metadata Generation panel on the right.
-
The status of metadata completion is indicated next to each file:
- Green check mark indicates that critical metadata is sufficient.
- Red X indicates that critical metadata is missing. Click the file name and the critical metadata fields are highlighted in yellow. Pink boxes indicate fields that lack information. Double-click to enter metadata.
Learn more about entering/modifying metadata here.
See the Metadata Glossary for more information on each metadata field
-
Click Convert to begin the conversion process.
If there is a file with the same name in the output directory, the "File Already Exists" dialog opens. Click yes to proceed and “converted” will be added to the end of the file name to distinguish the new file conversion process.
Copyright © 2021 All rights reserved. MBF Bioscience