
Entering Metadata
Overview
MicroFile+ software reads the metadata associated with your files and displays it in the the Metadata Generation panel. Use this panel, to view and edit the metadata that will be written to the converted image files.
See the Metadata Glossary for more information on each metadata field.
Procedure
-
Click the Show Metadata button to access the Metadata Generation panel. Do this before clicking the Convert button, on image(s) conversions.
-
The Metadata Generation panel displays a list of metadata fields that will be written to the converted image file.
-
Information present in the original file is used to populate the associated metadata fields. For example image scaling, number of pixels in x and y, number of image planes, and channel IDs and/or names may be pre-populated when you open the panel.
-
Edit and add metadata
-
Select an output file to edit its metadata.
If you clicked the checkbox to Require metadata entry before saving (the default), required metadata field names will be highlighted in yellow and empty metadata fields will be highlighted in red
- Double-click in a field to edit it manually. Note that greyed-out fields cannot be edited manually.
-
Show all editable fields check box
-
Check the box to show all metadata fields that can be edited manually.
-
Clear the check box and the information found in the source files is displayed. Required metadata and any data entered manually or through experimental presets is also displayed.
-
-
Experiment presets
Experiment presets can be created to store information about microscope mode, equipment used, spacing in X, Y, and Z dimensions, color channels, fluorophores, filters, camera exposure, and other information. Once they're set up, they can be used to populate metadata fields in subsequent file conversions.
Within the Experiment preset dialog, you can also create Camera, Objective, and Device presets, each with specific information about the tools used in your research.
-
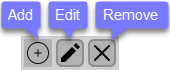
Use the add, edit, and remove buttons to enter as much or as little information as desired into presets.
-
Once your presets have been defined, you can use the information they contain to populate metadata in your output files using the controls below:
-
Apply to missing fields only check box:
-
Check the box to apply information from the selected experiment preset only to fields that have no information, retaining information from the original file if present.
-
Clear the box to overwrite fields with information from the experiment preset, even if they did contain information from the original file.
-
- Apply to current image button: Applies information from the experiment preset to only the selected image output file
- Apply to all images button: Applies information from the experiment preset to all image output files
- Reset to original button: Discards your changes to the metadata and resets the metadata to its original state.
-
-
Copyright © 2021 All rights reserved. MBF Bioscience