Preferences: Display
Purpose
Use Display preferences to customize the BrightSLICE software user interface.
Access Display preferences from File > Preferences > Display.
Interface theme
The BrightSLICE software user interface includes light and dark themes, designed for brightfield and fluorescence images, respectively.
Select the software-interface theme you prefer from the drop-down menu.
Interface options
Do not update ribbon layout when a new version is available: By default, the interface reverts to the original layout (i.e., before you made changes) when you upgrade BrightSLICE software.
Show lens in Quick Access toolbar: Displays the Lens drop-down menu in the Quick Access toolbar in the top left corner.
Show objectives in Quick Access toolbar: Displays the Objective drop-down menu in the Quick Access toolbar in the top left corner.
Number of most recent files: A list of the most recent files are displayed in the File menu. You can change the number of files displayed here.
Tracing window
Reference point radius (1-24): Set the size (in pixels) for the reference point by typing into the box or clicking the up/down arrows.
Show grid: Displays a rectangular grid overlay; its size is defined by Grid Spacing.
Displaying the grid may be useful for visually dividing a region into fixed areas for further analysis.
The grid is anchored at the reference point and moves along with the tracing as the tracing and stage are moved.
-
Bright grid: Displays grid at maximum brightness. Use when
-
Grid spacing (µm): Sets the dimensions of the grid.
- When you change the objective from one magnification to another, the grid changes size accordingly.
- At low magnifications, the grid can become so dense that the entire screen is covered with nothing but grid lines. The program prevents this by automatically turning off the grid when the spacing between grid lines drops below 4 pixels.
Show screen center mark: Displays a special marker at the center of the
- For optical lenses, this is the center of the screen.
- For video images, this is the center of the video image.
- For images from bitmapped files, this is the center of the image, or the center of the currently selected image if multiple images are loaded.
Click to open a color picker in which you can select a different color for the center mark. To avoid confusion, set the center mark to a different color than the reference point.
Video preferences
|
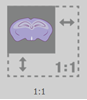
1:1: Video input is not adjusted to fit the main BrightSLICE window, but is displayed at native size. |
|
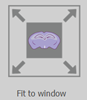
Fit to window: Adjusts the size of the video to fill the available space in the main BrightSLICE window. If the aspect ratio of the video is different from that of the monitor, a black region is displayed at the edge of the video. |
Recommendations
Choose 1:1:
-
When the video-camera resolution is lower than that of your monitor, and the entire video is displayed in the top left of the tracing window with black regions bordering the bottom and right of the video.
-
To increase the size of the video so that the field of view fills the entire main BrightSLICE window.
Choose Fit to window:
-
When the video-camera resolution is higher than your monitor resolution and only the top left of the video is visible in the main BrightSLICE window.
-
To reduce the size of the video so that the entire field of view is visible in the main BrightSLICE window.
Other video preferences
Clip detect levels: Provides a visual representation of over- and under-exposure.
Miscellaneous
Enable timer device: You may find the timer useful when setting up device command sequences.
Do not check for new version: Disables the alert about new versions of BrightSLICE software.
Use local help system: Check the box to use the offline, rather than the online help system (user guide).
Disable MBF Assure plan expiration reminder: Check the box to disable reminders that pop up when your BrightSLICE software MBF Assure plan is nearing its expiration date.
Click the button to choose whether or not you want to allow us to collect diagnostic data about your BrightSLICE software and your computer system.