Live workflow
To start tracking worms in real time, follow this procedure:
- Place the worms on the stage.
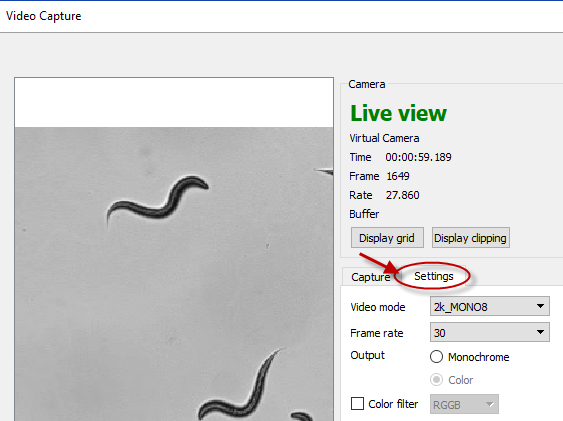
- Adjust the camera settings:
- Click the Video Capture button.

- In the Video Capture window, display the Settings panel.

- Select a frame rate and make other adjustments as needed.
Real time tracking is dependent on hardware performance and processing power. We recommend that you use the lowest resolution and frame rate possible to insure proper tracking.
- Click the Video Capture button.
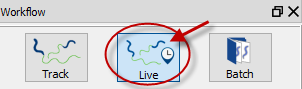
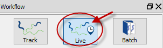
- Use the Live workflow:
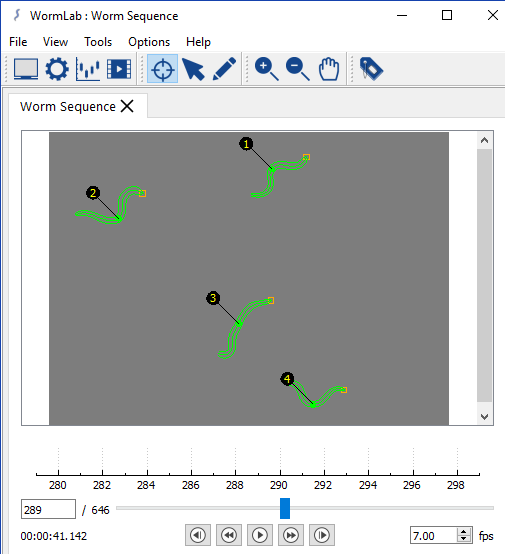
- Click the Live button in the Workflow panel (if you can't see the panel, go to the View menu and select Workflow). The worms are displayed in the Tracking window.
 This is the worm view you'll be using during the workflow.
 - Adjust settings in Set sequence info and Adjust image.
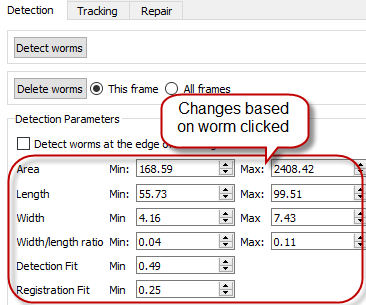
- Click Detect and Track to open the Detection and Tracking panels.
- Click a worm in the Tracking window to set the detection parameters (you should notice changes under Detection Parameters that reflect the worm you clicked).

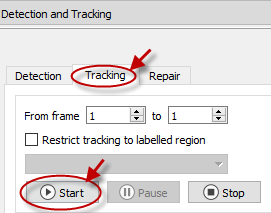
- Click Tracking and click the Start button.
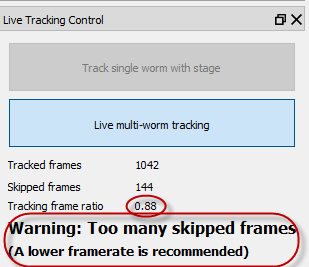
 Click Stop to end tracking.
During tracking, WormLab monitors tracked frames and skipped frames. Frame skipping occurs when your computer is unable to keep up with the data input from the camera. While skipping a few frames doesn't affect tracking (thanks to interpolation), skipping over 5% of the frames will result in invalid results. To avoid this problem, a warning is issued so that you can stop tracking and re-adjust camera settings.

- Click Analyze data to verify that data has been acquired.
- Click Save project. When you open the project, you can view a video that constitutes a virtual representation of worm movement.

- Click the Live button in the Workflow panel (if you can't see the panel, go to the View menu and select Workflow). The worms are displayed in the Tracking window.