Edit and order the sections
TissueMaker workflow step 3
Edit and order the tissue sections that will be used in the reconstruction.
- For detailed instructions on editing, see Editing section outlines.
- To take missing sections into account in the ordering, see Working with missing sections for the complete procedure throughout the workflow.
You can interrupt the reviewing process and return to it later without losing your work. When you start the workflow again, TissueMaker applies the edits and ordering from the previous session.
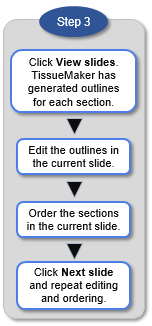
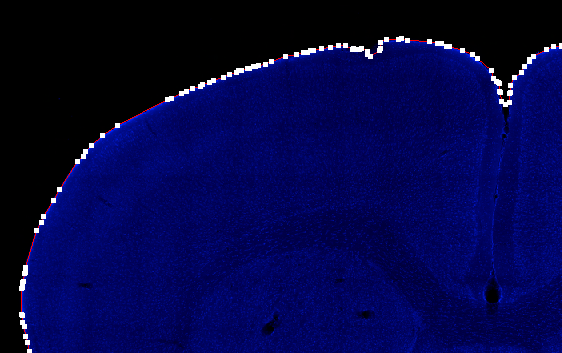
When you click View Slides, each slide is displayed with red section outlines generated by TissueMaker. 
- Under Slides to review, select All.
- Click View Slides. The first slide is displayed with the section outlines.
- Click the outline you want to edit to select it. The selected outline is represented by a series of white points.

- To edit the outline, use the tools provided in the workflow panel. You can also refine the outlines manually. See Editing section outlines for detailed instructions.
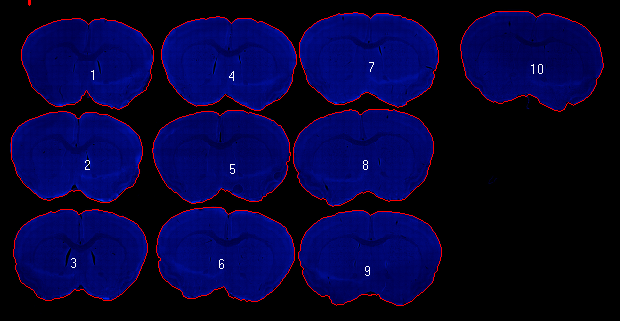
- Under Order section within slide, select a method then click Start Ordering.
- Click Next Slide and repeat steps 3-5 until all slides are edited and ordered.
- Click Next Step.
If you selected Manually, click inside an outline to number it.
- All: TissueMaker displays all the slides you selected.
- Unfinished: TissueMaker only displays the slides that have not been ordered (either because you haven't performed this step yet, or because you already performed this step but skipped ordering for some slides).
- Single: TissueMaker displays the slide selected in the drop-down menu.


|
Click a contour to select it then click the button. |

|
|

|
Use this function to create a placeholder for a missing tissue section (see Working with missing sections) OR to draw a contour manually for a section that isn't delineated (see Drawing an outline manually in Editing section outlines). |

|
Use this function to refine the contours or to revert to the original contours generated by the program. When you change the settings, these settings persist the next time you use this button.
You can also refine the contours manually. |
- By Row (By Column): Sections are automatically ordered and numbered by row (column).
- Manually: Click inside each section contour in the order to be used for the reconstruction. Numbers are displayed in each section to indicate the order.

If you used By Row or By Column, you can edit the ordering manually:
- Right-click to undo the last section ordered.
- Once a section is no longer numbered, you can click it to number it.
If you edit the slide after ordering, the ordering is lost.
About the outlines generated by TissueMaker
TissueMaker first detects connected regions bounded by large image gradients (edges); these regions are interpreted as individual sections. After detection, the program generates an outline for each individual section detected.
Where two sections overlap, TissueMaker automatically identifies “pinch points” to split the outline into two separate outlines. Pinch points are defined as being close to each other in 3D space but distant from each other along the outline path.