Image selection panel
 To open the Image Selection panel, click the Image Selection button in the Workflow section of the ribbon.
Use this panel to load and configure images.
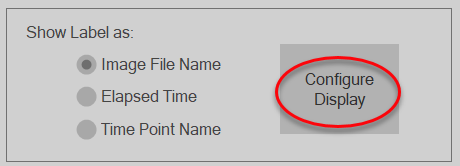
To re-order images, use Configure display.
Functions
Select and load your image files by clicking on the Add Images button.
A dialog box opens that asks if the images are from different time points: 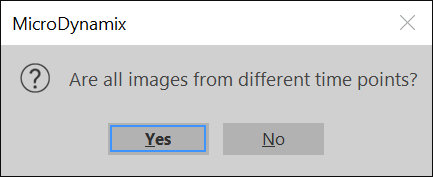
- If you click yes, the images you load are automatically registered, and the first image (by alpha-numerical file name) is used as the reference image.
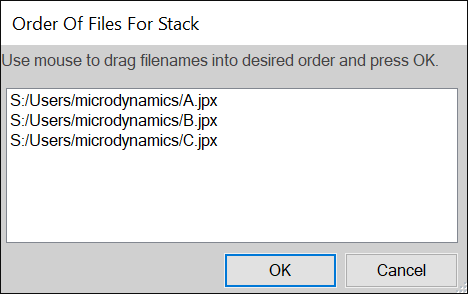
- If you click no, after choosing the images to load, a dialog box opens that asks you to use your mouse to drag the files into the desired order for analysis:

Check the appropriate boxes to view two time points in the desired viewports. To close/remove an image, click the red X.
For example, the image shows settings to display image A in the left viewport and B in the right viewport: 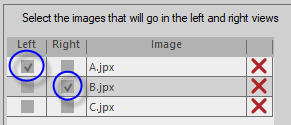
Labels are shown in the Image column: 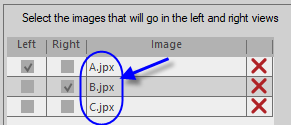
Instead of the default image file name, you can choose:
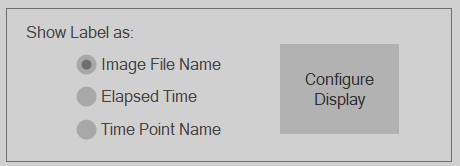
- Elapsed time: The time between image capture of two time-points; use the Configure display button to enter your information.
- Time Point name: The default name is Time Point X; use the Configure display button to enter your information.
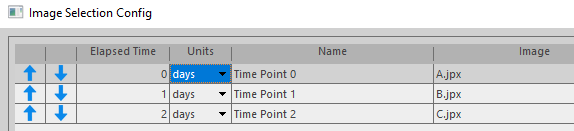
You can configure:
- The order of the images; re-order using the arrows to display the images in your preferred order (typically in time order).
- Elapsed time: Double-click to enter a different value.
- Units: Change from minutesto hours, days, weeks, or months.
- Name: Double-click to enter different image names. Note that these names will display in image analysis results that can be viewed and exported from the Analysis Viewer.