Working with missing sections
See BrainMaker Workflow overview
You noticed that some of the tissue sections were unusable/missing from the slides. So you re-imaged the slides with missing sections to create replacement sections. To integrate the replacement sections into the reconstruction, follow this procedure (instructions below are for one missing/unusable section):
- In step 1, select the original files and the files with the re-imaged data. The files with the re-imaged data must be placed at the end of the list.
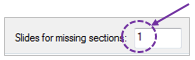
- In step 2 under Slides for missing sections, enter the number of slides containing replacement sections.
- In step 3, review the slides.
- When you reach the slide with an unusable section, click it to select its outline and press Delete to remove the outline.
- Click the Add button and select Placeholder for a missing section.
- Click once over the unusable section to place the placeholder.
- Click the Start Ordering button.
- Continue reviewing the slides until you reach the slide with the replacement section.
- Delete the outlines that are not needed for the reconstruction; keep the replacement section outlined.
- Click Start Ordering.
- Finish reviewing the slides and go to the next step.
For more than one missing/unusable section, keep track of the location of the missing sections and of their corresponding replacement sections for step 4.
- In step 4, click Modify Final Section Order.

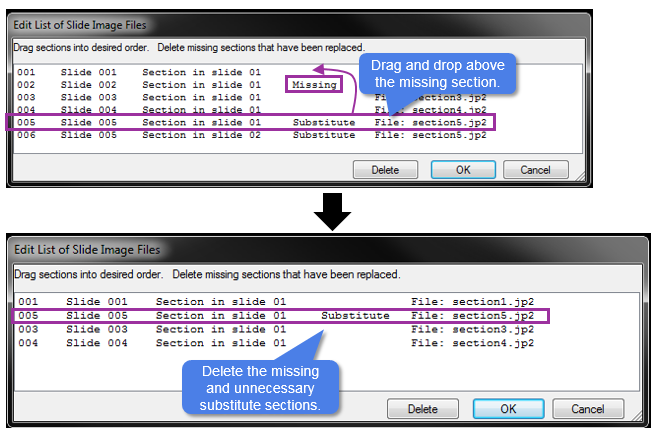
- Select the replacement section in the list (labeled Substitute) and drag it over the section to be replaced (labeled Missing).
- Highlight the Missing section you are replacing and click the Delete button.
The number of slides to be used for the reconstruction is automatically updated.