Permit access to images
Once images have been added to a
To do so, follow these steps:
- In the browser, double-click the name of the
- Click the click the icon
 in the
 - Select the desired Privacy setting for the
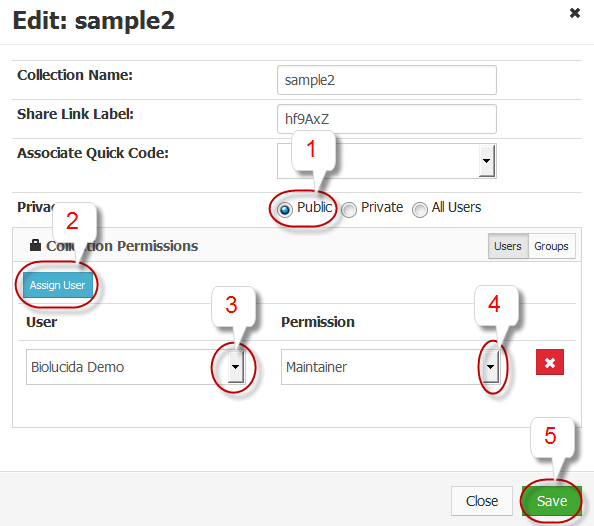
- Public: Anyone (without a user account on the server) can view the images. You may designate users other than the administrator to manage the
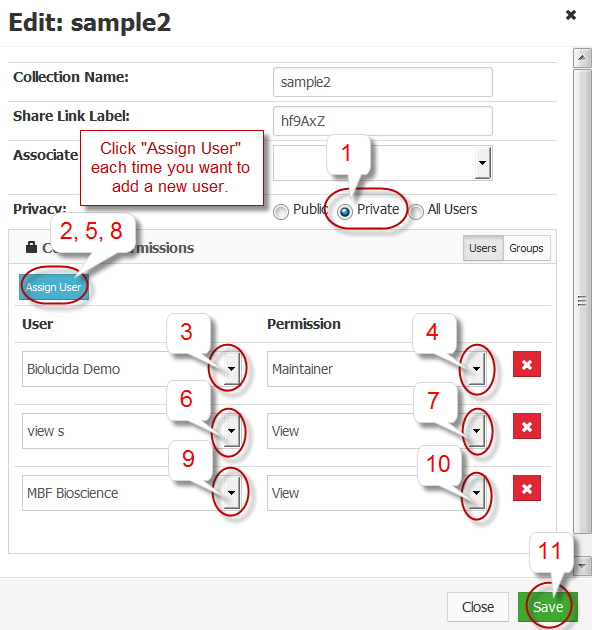
- Private: Only selected users can access the images. You may assign different permissions to different users.
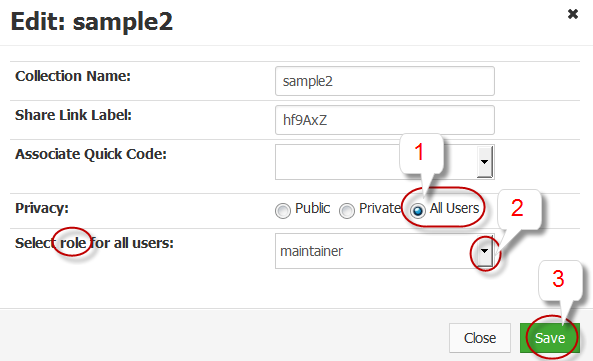
- All users: Everyone with a user account on the server can access the images. A single user role is assigned to all the users.
- Define what the users can do with the images.
- If you selected Public or Private: Assign users then select permissions for each assigned user.
- If you selected All users: Select a single role for all the server's users.
Examples
- Setting up a public

- Setting up a

- Setting up a

See Organizing images, About Biolucida users