Tracing contours (2D)
Before you start
- Bring a specimen into view, make sure that a reference point has been placed.
- Enable AutoMove if you plan to trace contours that are larger than the field of view.
Closed vs. open contours
- Use closed contours to obtain measurements of the area within the contour or to specify regions of interest for automatic cell detection.
- Open contours can be used as delineations or reference lines to indicate layers in a reconstruction; this may be useful for measuring structures.
Procedure Notes
At any time during contour tracing, you can:
- Adjust the thickness of the contour by scrolling the mouse wheel.
- Press Ctrl-Z to erase the last drawn points one by one back to the beginning of the contour.
-
Focus with the joystick or the Page Up | Page Down keys on your keyboard.
-
End a contour by right-clicking and choosing End Open Contour or Close Contour.
Procedure
-
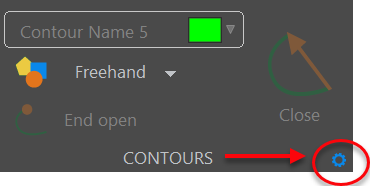
Controls for drawing contours are in the Contours section of the Registration ribbon.
-
(optional) Select a named contour from the drop-down menu. The default is the first contour name in the list.
You can change the name and/or color of the listed contours in Contour preferences, accessible from the cog icon in the ribbon or File > Preferences > Tracing > Contours.

-
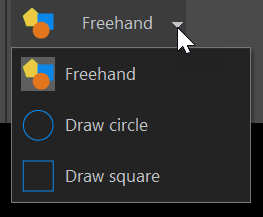
(optional) Choose to draw a circle- or square-shaped contour by selecting one of those options from the drop-down menu. The default is to draw a freehand shape.

-
- .
- Select a tracing method by right-clicking in the tracing window. The method chosen is strictly a matter of preference and can be changed at any time during the tracing by right-clicking and selecting a different method.
- Trace the contour of choice: Click to place points along the boundaries of a region of interest; when you're done, right-click and select close contour or end open contour.