Tracing contours
Purpose
- Use closed contours to specify regions of interest. They can be used for measuring structures, systematic random sampling,
- obtain measurements of the area within the contour.
- obtain measurements of the area within the contour.
- Open contours can be used as reference lines to indicate layers in a reconstruction. This may be useful for measuring structures with
See also Automatic contour tracing, Selecting and editing contours (2D), and Editing contours (3D).
Before you start
- Bring a specimen into view
-
 Enable AutoMove if you plan to trace contours that are larger than the field of view.
Procedure Notes
At any time during contour tracing, you can:
- Adjust the thickness of the contour by scrolling the mouse wheel.
- Press Ctrl-Z to erase the last drawn points one by one back to the beginning of the contour.
-
Focus with the Page Up | Page Down keys on your keyboard.
-
End a contour by right-clicking and choosing End Open Contour or Close Contour.
Procedure
-
Controls for drawing contours are in the Contours section of the Registration ribbon.
-
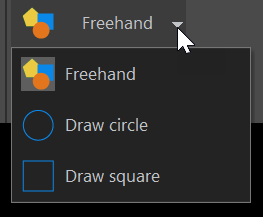
 Click to draw a freehand shape or select the option to draw a circle- or square-shaped contour from the drop-down menu.
 -
Choose a contour name before you begin drawing a contour using one of the following methods:
-
 Choose a name from the Contour name drop-down menu; click to show the drop down menu, then click on the name for the contour you want to draw. If you don't choose a name, the first contour name in the list is used.
 -
-
Select the name for the contour you want to draw from the Contour Selection panel by clicking it.
-
You can change the name and/or color of the listed contours in Contour preferences; accessible from the cog icon
 in the ribbon or File > Preferences > Tracing > Contours. To change the name and/or color of a contour, click the name and type a new name; double-click the color picker and select the color you want.
-
-
- Select a tracing method by right-clicking in the tracing window. The method chosen is strictly a matter of preference and can be changed at any time during the tracing by right-clicking and selecting a different method.
- Trace the contour of choice: Click to place points along the boundaries of a region of interest; when you're done, right-click and select close contour or end open contour.