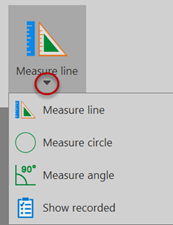
Measure line/circle/angle, Show recorded
Purpose
|
BrainMaker software doesn't save these measurements to the data file; they are only available during the current session. |
Procedures
Each measurement tool operates in a continuous mode in which you can take successive measurements.
- To end measurements, right-click and select Stop Quick Measurements, or initiate another action (e.g., Align tracing or Move To), or press ESC.
- To take only one measurement at a time and return to the previous mode, right-click and deselect Continuous.
-
 To view, print, or copy measurements to the clipboard, click the Show recorded button.
Measure line
Taking a single measurement
-
 Click Measure line.
 - Click one end of the line, then the other end of the line.
- The measurement is displayed.
Taking multiple-length measurements from a single point of origin
-
Click Measure Line.
- Click the point of origin.
- Position the cursor over the end point of a first line.to take a length measurement.
- Press F8. The program records a measurement, but the rubber line is still anchored at the point of origin.
- Move the cursor to the end of another line and press F8 again to record the new length.
-
Click Show recorded to view the values recorded for the different lengths.
To measure the distance across multiple fields of view, use the arrow buttons in the toolbar.
To adjust your origin point, press the SHIFT key and drag the line.
To constrain the line to 22½° increments, press the CTRL key. Helpful to draw perfectly horizontal and vertical lines.
Measure circle
-
 Click Measure circle.
 - Click the center of the circle.
- Drag the mouse to draw the circle.
- Click to view the measurement.
Measure angle
This tool measures an angle defined by three points.
-
 Click Measure angle.
 - Click along the first side of the angle.
- Move the mouse to the vertex of the angle and click again.
- End by clicking a point on the other side of the angle. The angle is displayed in degrees and radians.
Display measurements
Measurements are temporarily recorded for the duration of the session.
-
To view the recorded measurements, click Show recorded. Measurements are displayed in the order in which they were made.
- To view details about a measurement, double-click the entry.
- To add a comment, highlight an entry and click Comment.