Review the alignment
BrainMaker workflow step 6
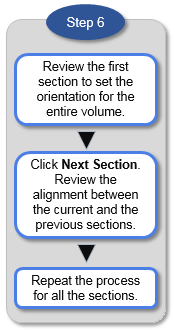
In this step, only the first section is displayed initially so that you can adjust the rotation and set the orientation for the entire volume.
- To rotate a section, use the Image controls buttons in the workflow. From your keyboard, you can also use the "." (period) key to rotate right and the "," (comma) key to rotate left.
- To help with the adjustments, use the grid (check the Show Grid box in the workflow panel). You can adjust the cell size with the corresponding slider.
Once you've reviewed the orientation based on the first section, you can adjust the alignment of the sections, two sections at a time. When two sections are displayed, they both appear as semi-transparent. You can move the current section to align it with the previous section.
If you can’t determine the tissue orientation from small sections cut early in the block, use Rotate volume to rotate all the sections at once from any section. 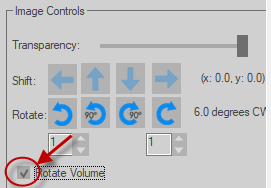
- To move the current section, use the arrow buttons in the workflow panel OR the arrow keys on your keyboard, OR drag the section.
- To adjust the transparency, use the Transparency slider in the workflow panel OR the "+" and "-" keys on your keyboard.
- To show only the previous section, move the slider all the way to the left; to show the only current section, move the slider all the way to the right.

- To refine a manual adjustment (rotation or translation), click the Refine button.
You may notice that the image information in Image Adjustment doesn't reflect the original image data. 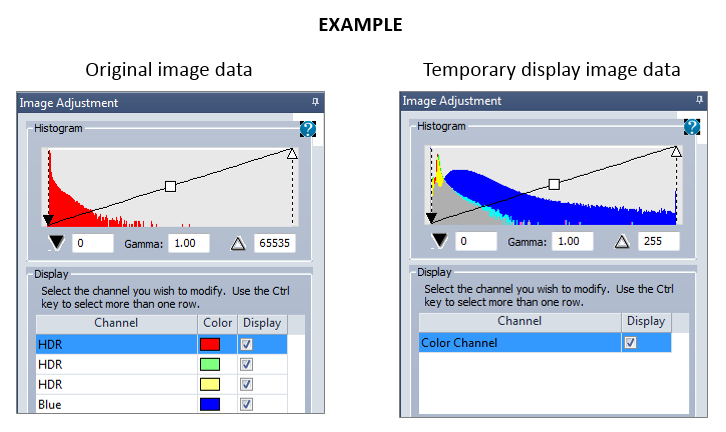 This is only temporary and designed to make the alignment process more efficient. BrainMaker will use the original image data for the reconstruction.