Creating subvolumes (3D)
Principle
The Subvolume tool enables you to specify subvolumes (regions of interest) and load image data only from those regions. You can then work in portions of the image volume. By creating subvolumes that overlap slightly, you can reconstruct the entire image volume piece by piece. Creating subvolumes may facilitate tracing when:
- Image volume is very large: creating subvolumes for tracing can maximize BrainMaker responsiveness.
- The image is complex: tracing visually complex images may be more manageable when divided into subvolumes.
- Different areas of an image volume require distinct tracing parameters.
See also Image Slice display options.
Procedure
- Open an image file and view it in the 3D Environment.
 If the 3D Environment is not open, click the 360 button in the Trace, Image, or Workspace ribbon to open it.
 - Create a subvolume:
- Click the Subvolume button

- Move and resize the box as needed:
- Click in the image to move the box to the cursor location (the clicked point will be the center of the box) OR drag the box with your mouse to reposition it.
- Drag the spheres to resize the subvolume OR hold the Shift key and roll your mouse wheel to resize in all dimensions proportionally (see details below).
- Drag your cursor to rotate the image in 3D and view the subvolume from different angles. Resize the subvolume as needed to include the desired regions of the image volume.
- Click View Subvolume to load image data and display the region of interest you just defined.
-
Trace structures as needed within the subvolume using the tools in the 3D Environment.
- With automatic tracing tools, reconstructions wil be confined to the subvolume.
- With manual and semi-manual tracing, for example trees, it works differently. As your tracing approaches the edge of the subvolume, a new subvolume of the same size will be displayed so that you can continue tracing the active structure.
- Click View Full Volume to exit the current subvolume. The semitransparent box with spheres will be displayed again.
- Move and resize the box to define additional subvolumes as needed. You may want to overlap subvolumes slightly to facilitate reconstruction of structures than span more than one subvolume.
A semitransparent box, with spheres as control-handles for X, Y, and Z dimensions, will appear on the 3D image. It represents the subvolume. 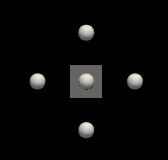
(optional) Click Save Subvolume and enter a name in the dialog box that appears. Saved subvolumes are listed in the "Saved Locations" table. 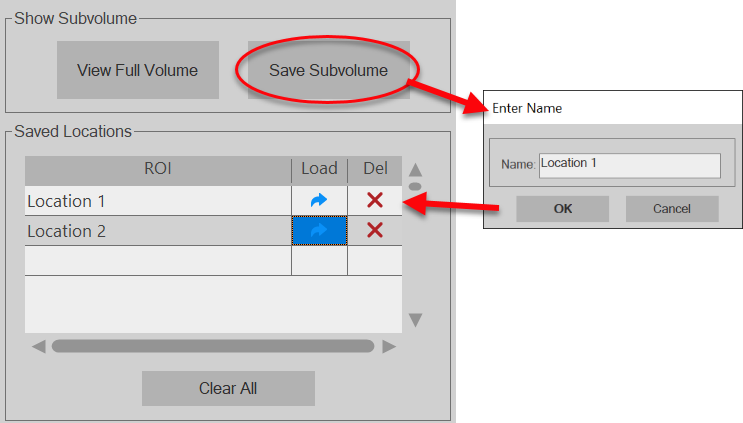
Saved locations (subvolumes) are retained only for the current session; they are not saved with the data file.
Commands and Functions
Subvolume button
Click the Subvolume button to divide your image volume into subvolumes to facilitate reconstruction.
-
Move the box to the desired region of the image volume one of the following ways:
-
Drag the box to the desired location.
-
Click where you want to place the box; the clicked point becomes the center of the subvolume
-
Re-size the box to fit the region of interest one of the following ways:
- Drag any of the spheres. The sphere will turn green when selected; if it doesn't turn green, you need to rotate the image to make it possible to select and move the sphere.
- Hold the Shift key and roll your mouse wheel to resize in all dimensions proportionally.
Show Subvolume
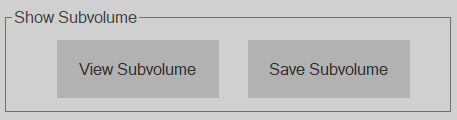
View Subvolume/View Full Volume: Toggles between loading image data for the subvolume or the entire image.
Save Subvolume: Click to name and save the current subvolume. Note that saved locations (subvolumes) are retained only for the current session; they are not saved with the data file.
Saved Locations
The table shows subvolumes saved in the current BrainMaker software session.
Saved locations (subvolumes) are retained only for the current session; they are not saved with the data file.
- Click a table row and the corresponding subvolumes is displayed on the image.
- Double-click the name of a subvolume to change its name.
-
 Load button: Click to load the selected subvolume.
 -
 Delete button: Click to delete the selected subvolume. (Note this action cannot be undone.)
 -
 Clear All button: Clears all saved locations. (Note this action cannot be undone.)